Your Smile is Your Best Accessory (and Best Kept Stylist Secret)
As an Image Consultant, one of the first and most important areas my clients and I discuss are first impressions. Did you know that it can take less than 30 seconds for someone to make up their mind about you when they first meet you, and their impression is primarily based on how you look? (Statistically, looks make up ~ 55% of someone’s first impression of you). Your smile can be one of the first things that people notice. If it’s a welcoming and bright smile, it can help the first impression you make be more profound and positive.
I’m a huge fan of bright teeth, I think when you see someone who has a big, open, white smile you immediately think of them as more friendly, welcoming and attractive. It also shows that they take care of their health, and pay attention to the way they look – which often translates into their attitude towards life and others in general.
That said, keeping your smile bright can be challenging. It takes resolve – like being mindful of the foods that stain (such as red wine, black coffee, some fruit juices, etc.) It can also be overwhelming to find the right products to get your teeth whiter – that are effective but don’t break the bank. In my experience, off-the-shelf whitening products don’t always work, and whitening in a dentist’s office can be an expensive, painful and lengthy process. I’m sure this prevents many people from whitening in general – which can result in shortchanging that area of their image.
I’ve tried many teeth whitening methods in the past – from custom trays from a dentist’s office, to the GLO Whitening System from Sephora, to Crest Whitening Strips, and assorted whitening toothpastes. I felt that while many of the products worked with varying results, they always caused a lot of discomfort to my sensitive teeth.
So you can imagine how excited I was when an at-home professional teeth whitening company called Smile Brilliant reached out to me, offering to try their system – designed specifically for those with sensitivity to whitening – and share my experience with you guys.
Smile Brilliant whitening process is recommended by more dentists than any other procedure in America, and they proudly produce their custom-fitted whitening trays right here in the United States.
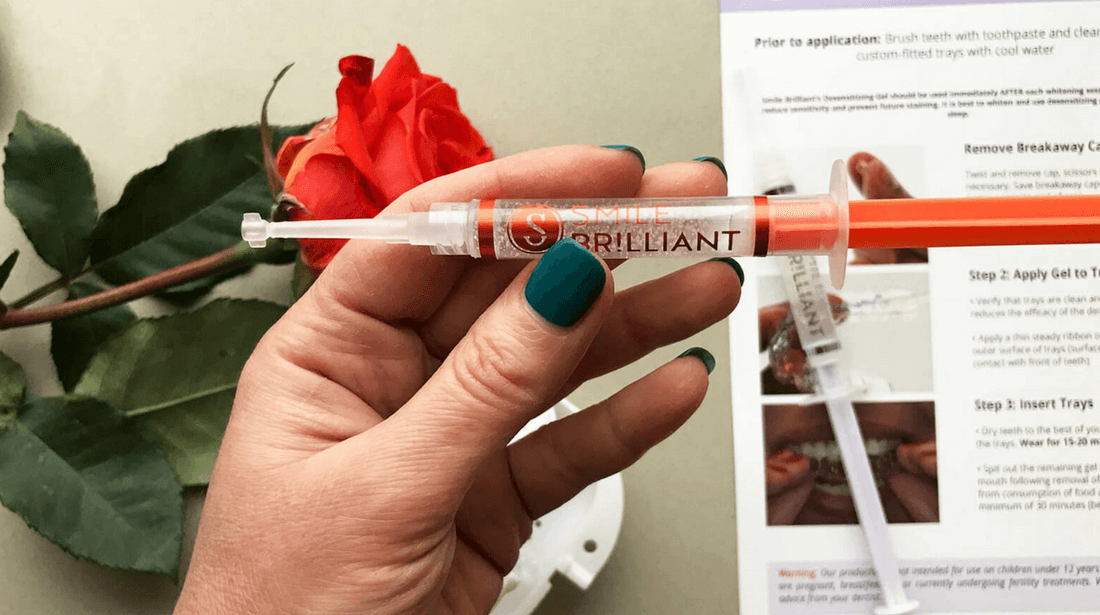
The process of getting started was super simple. First step was receiving a box in the mail, containing all the essentials: materials to make my own custom molds for dental impressions (at home), whitening & desensitizing gel syringes, a pre-paid padded envelope to send the molds into their lab, and detailed instructions. I’m a sucker for all things pretty and colorful – and the presentation of the box contents didn’t disappoint – with bright orange and purple (complementary) colors!


Making the molds was easy and fun (Confession: I enjoyed playing with the play-doh-like material very much – I must not have gotten enough of that during my kindergarten days 😉 ). You do have to act pretty quickly when you mix the 2 materials together (white and blue – catalyst and base paste) so they don’t solidify before you have a chance to literally sink your teeth into them.

After I mixed the catalyst and base paste together and placed the mixed putty into the provided trays, I made my impressions for the custom whitening trays one at a time – top and bottom, and let them rest for a bit until they hardened. Then I popped them into the provided padded envelope and filled out the return card with my info – and dropped it off at the nearest USPS mail box.

Just under 2 weeks later, I received my custom-fitted teeth whitening trays in a handy white case – so I was ready to start whitening!


Before the whitening, I wouldn’t say that my teeth were that stained or yellow, as I do try to take care of them the best I can. They could certainly use a touch-up and some brightening – I’m a big fan of lattes and earl grey tea 😉 ! They recommend doing 45-60 minute whitening sessions for about 7-10 days in a row to get the best results, each session followed with about 20 minutes of desensitizing gel to help rehydrate your teeth by temporarily blocking the pores in your teeth, which become opened by the whitening gel. They also recommend doing the whitening sessions before going to bed (to avoid re-staining, and to allow the desensitizing gel to work overnight).
I started out my first session on an afternoon, and found that my teeth were definitely sensitive to the gel. I made the mistake of brushing my teeth with toothpaste before applying the whitening gel – and then not brushing them with toothpaste before applying the desensitizing gel – so I think that may have been what caused the extra sensitivity. I decided to skip a day after the first time to let my teeth recover, and tried again the following day. That time around, I followed the proper order:
- Brush my teeth with water only, and floss thoroughly.
- Apply whitening gel for 45 minutes using my custom teeth whitening trays.
- Brush my teeth with toothpaste.
- Rinse out my custom whitening trays.
- Apply desensitizing gel for 20 minutes using my custom whitening trays.
- Remove trays, clean them with cold water & store in the plastic container.
- Leave the remains of the desensitizing gel on my teeth – not rinsing it out, allowing it to continue working.
I felt little to no sensitivity when following the above process, and proceeded to whiten for the next 8 days. Even though they recommend doing the whitening before going to bed, I found (through trial and error) that my teeth were much more sensitive in the evening. So, being the multi-tasker that I am, I opted for doing the whitening in the morning or afternoon, while I was showering and getting ready. It worked out really well – and by the time I was ready to leave the house, my teeth whitening was done for the day!

Overall, I am very happy with the results! Again, I wasn’t starting with super yellow or stained teeth, but I definitely feel that the process brightened my teeth and lifted the more persistent stains. It was also minimally sensitive – especially compared to various other methods I’ve used before. If you find that your sensitivity to whitening is generally higher than normal, check out some additional remedies you can use to combat it.
If you’re interested in getting an easy, affordable and effective at-home teeth-whitening system, look no further!
You’re also in luck – because especially for my readers, Smile Brilliant is having an exciting giveaway. You can win a $139 store credit towards any whitening system. To enter, go to SmileBrilliant & sign up! Winner will be announced in 2 weeks.
*Giveaway open to UK, Australia, Canada, and USA residents*
If you’d like to purchase your system now, SmileBrilliant is also offering 5% off with code “modnitsastyling5“. They ship worldwide 🙂
And remember – #SmileFearlessly, it’s your best accessory!
xo,


Laura Mitbrodt
This product looks great, your teeth look super white
xo
http://www.laurajaneatelier.com
Sam Thorpe
This sounds amazing! I have sensitive teeth too, and always worry about whitening products hurting, but I’m glad to hear these didn’t! Definitely need to check it out! xo Sam
https://iamsamthorpe.com/
Jen
I did a giveaway with smile brilliant last year and also had an awesome experience! Great company and results!
Courtney Bentley
this products sounds awesome thank you for sharing your thoughts on this. love you S M I L E btw.
Courtney Bentley || http://www.courtneyvioletbentley.com
Rachel
I love my Smile Brilliant set! I use it all the time. You got great results!
xo Rachel | http://www.thesassroom.com
Barb
I LOVE the fact that you don’t have to go to a dentist to get our teeth whitened with this product! I mean, who likes going to the dentist?? Looks like it worked great on you! 🙂
xoxo Barb
http://www.flashesofdelight.com
Shruthi Rajashekar
Wow! I’m always looking for new ways to keep my teeth white so this was very interesting to read. Great results lady!
Sincerely Ophelia
wow! this is really cool! and i agree that your smile is your best accessory!
https://sincerelyophelia.com/2017/04/10/2-simple-steps-protect-new-designer-leather-goods/
Miki
I have used teeth whitening kits and this one looks like a really good, easy to use one that is convenient! Thanks for sharing.
Xo,
Miki
http://mikialamode.com
Nathalie
Looks like a wonderful product! Should def. try!
xx
Nathalie
http://www.crayonsinmylouboutins.com
Tessa Breeden
This product sounds amazing! Your teeth look so good. I have got to try this!
xx, Tessa
http://www.tessatailored.com
Dina
Thanks, Tessa! You should definitely enter the Giveaway to win your own Whitening Kit ($139) – all details at the bottom of the post!
xx,
Dina
Laura Mitbrodt
Your teeth look so good, what a great product
xo
http://www.laurajaneatelier.com
Dina
Thanks, Laura! Definitely check out the giveaway in my post – you can enter to win a whitening kit for yourself!
Gisel Luna
That’s such an interesting concept! It amazing how you can get teeth whitening in the mail. Great post!
Gisel | http://www.mintandthrift.com
Dina
Thanks for checking it out, Gisel! Be sure to enter the giveaway to win your own whitening system!
Delayna
I love teeth whiteners! I would love to try this one!!
Thanks for sharing!
Delayna Denaye
http://www.delaynadenaye.com
Dina
You should definitely enter the giveaway to win the whitening system! Thanks for checking out my post 🙂